Showing posts with label mini album. Show all posts

Monday, 1 October 2018

Geek Girl Layout

Sneaking in one last, little layout made with last month's kit from The Wild Hare Kits before we reveal our new kits tomorrow.


I found this lovely notebook at Wilko and decided to start an 'old school' scrapbook for some of my current favourites. I loved the splatter effect in the notebook and chose colours to work with them - isn't the epoxy flare beautiful?


Absolutely adored this kit, but can't wait to share my new kit tomorrow! 💕

Tuesday, 11 September 2018

Learn Something New Every Day - Mini Album

Today, I want to share a lovely, little mini-album. It's been some time since I last did Learn Something New Every Day. So, over the course of a weekend and with a little bit of time to create, I hauled out my basket of shame (it's where I keep my scraps!) and one of the smaller dies from the Bubble Box Fri-Die Set from CAS-ual Fridays Stamps. I made a little mini ready for class! I love it!


That rub-on was already on the cardstock (so that shows how old it was) so all I needed to do was add a little title and it was done. I'll share the finished album at the end of the month!

Monday, 18 June 2018

Wild Hare Kits: Vacation Mini Album

Hello! Hello! After a little visit to ‘Memory Lane’ earlier in the month, – as I revisited some of my favourite travels, courtesy of The Wild Hare Kits – I’m now excited to be back on the road!


I’m on holiday at the end of the month – back to the beautiful island of Madeira – and I wanted to make a head start on my vacation album. I love vacation mini albums so I decided on a 3x4 format. The kit I received had a wide selection of 3x4 and 6x4 Project Life Cards, so I used these for the majority of my base and I’ve decorated some of the cards already. The die-cuts from the Here and There Collection are so much fun!


For the front of my album, I’ve used Paper No. 22 from the Paige Evan’s Pick Me Up Collection for Pink Paislee (which is easily the most adorable cardstock I’ve ever seen!) and I’ve decorated it with a die-cut and flair from the Here and There Collection – and a little bit of the twine I received in my kit!


The album is a little chunky already, but that makes me excited to see it when it’s finished – and that means that I have something to look forward to when my holiday is over. Not everyone can say that, right?

I’ll be sure to share a full look at the album as soon as it’s finished!

Sunday, 4 February 2018

December Daily: It's All Finished!

It's finished. December Daily 2017 is finally finished. I love this one so much - and I think it's mainly down to the fantastic kit I received in November from The Wild Hare Kits. I took a day of leave to start work on the album in November - and had intended to finish it at the end of December or the start of January, but I've been so ill!


So, it''s a little bare towards the end, where I would normally have been busy visiting friends and family. But, hey, that's life! Now onto spring, I hope!

Sunday, 19 November 2017

Wild Hare Kits: December Daily, The Reason Why

My 'The Reason Why' layout for December Daily is finished and I am so very happy with how it turned out. It features lots of lovely die-cuts from (or made with) my latest kit from The Wild Hare Kits.

I have that 'Holiday Joy' feeling every time I look at it! 🎄❤ 🎅


I'll have December Daily foundations to show soon - I seriously love scrapbooking the holidays!

Saturday, 18 November 2017

Wild Hare Kits: December Daily Foundations

Is it a little bit nuts that I took some annual leave especially to do my December Daily foundations?


I had a happy little day at home; with my latest kit from The Wild Hare Kits, some Christmas tunes and a lot of biscuits! And it's ready! Here's a little look at the foundations for December Daily 2017.

Thursday, 6 July 2017

Summer Memories Mini Album {July's Counterfeit Mini Kit}

This month, I’m 'officially' on the Mini Kit Team for the Counterfeit Kit Challenge and I am so excited to share the kit that I've made, based on this month's inspiration kit, Walden Pond, from August 2016 at Cocoa Daisy.

As soon as I saw the colour scheme of the kit, I decided to make a mini-album to document some summer memories. Each time we visit Adrian's family in Portsmouth, we have a lot of fun - and we found an outdoor 'assault course' on our last visit. 


I decided to use some of the cards leftover from recent Elle's Studio Monthly Kits, and chose a mixture of Blue, Green and Yellow. I then added in some die-cuts from the same leftovers, some washi and a set of Elle's Studio Stamps (which I didn't use in the end!) I didn't use any of those Simple Stories Alphas either! :)


And here's the little mini-album that I made. It's absolutely adorable. It's need some additional journalling, but I really want the kids to add that in their own words (and handwriting) so at the moment, I'm considering it 'almost done'. 


There’s more inspiration from the rest of the Mini Kit Team - Lisa, Margie and Kelly – over on the Counterfeit Kit Challenge.

Wednesday, 3 May 2017

Life Is A Song Pocket Letter {It's Arrived!}

My 'Life Is A Song' Pocket Letter has, finally, reached it's new owner and I am very happy to hear that Catherine loved receiving it as much as I loved making it! I adored the theme of the event, finding that writing the letter sparked some journalling - and a few scrapbooking projects that I'll be sharing soon! 


For this shot, I took all of the little cards out of their Pocket Letter, so it looks a little bit wonky. I've found a much better way of setting up my shots since sending out this one. Rapid improvement! In true 'me' style, it's a little minimalist in terms of decoration because I wanted the theme - and the little extra - to do most of the shining!


Probably my favourite element of the Pocket Letter, I love this little corner, with it's Dear Lizzy sentiment and a handmade button clip. (I do love adding little extras that I've handmade.) And, it's on the outside of the Pocket Letter, so it adds a nice, dimensional touch!


The Pocket Letter Guide (available as a free download) also recommends little extras that could be included - either as an element of the overall letter, or as a hidden extra - so I raided my, shockingly sized, unused stationary stash *ahem* and sent some extras - washi samples, clips, stick-it notes and buttons. 


Since the Pocket Letter itself was a little minimal, I wanted to include something a bit more dimensional, so I decided to make a mini (truly, tiny) album so that I could also send some paper samples, brads, tags and more washi. I love how it turned out and I'll definitely be making more of these little beauties in the future! It was a wonderful way to use leftovers from my January Counterfeit Kit - Moody Blues.

I've found Pocket Letters a lot more fun that I was expecting. There's something really lovely about creating a Pocket Letter - and litle extras - for someone else (and usually, for someone that you haven't even met) and then sending it on it's way. If you have been thinking about joining in with a swap, then I would definitely recommend The Pocket Letter Pals Network or maybe you would like to swap with me?

Saturday, 16 April 2016

Poland Mini Album

It's time for the Challenge #3 over at the Counterfeit Kit Challenge (I can't quite believe how quickly the month's are passing by, can you?) and we're incorporating little bits and bobs of everyday life into our layouts, mini-albums and mixed-media for Ephemera Encapsulated.

This month, I decided that I should work on (finally) making a mini-album about my trip to Poland in 2015 - it's only been a whole thirteen months since I went! And as a result of the challenge I've included a few little thing that might not have made their way into a mini-album otherwise.


To start, I cut bases of 3.5 x 4.5 inches, keeping all of the little off-cuts to use for layering. I didn't bother trimming any of those further, I simply layered them randomly onto the bases - then added some small photographs (2 x 3 inches) It was a really simple process, which would have been even easier had I not been working on my teeny, tiny little desk!


After layering all of the paper off-cuts and photographs, I added some machine stitching to increase the texture (and add a shabby-chic feel) and I think it lends a more 'unified' feel to the album as a whole.


Once I'd finished adding some stitching, I laid out all of the bases and chose some embellishments, stamped images or sentiments and little sparkles to add for a little extra interest and texture. Unlike my layouts, which I keep quite minimal, I love to have a lot of 'chunk' to my mini-books!


Isn't this cupcake stamp from Papermania really cute? It was the perfect accompaniment to a photograph of the amazing cakes we tried in Gdansk! Oh, how I long for some more of that apple pie and cinnamon ice cream! *swoon*


To add a little interest, I die-cut some of the bases (using a die-cut I borrowed at my local scrapbooking crop - thanks ladies!) and then mixed them in amongst the rest of the bases, along with some smaller ephemera like bus tickets and receipts.


To complete the Ephemera Encapsulated Challenge, I found some beautiful vellum (I had none in the original kit) and stitched a small envelope for a business card we collected from a local restaurant and sealed it in with some sequins. It looks amazing in real life - and the vellum looks so lovely.


I am, honestly, so thrilled to have this little album made - and it's really down to how amazingly beautiful my Parc Monceau Kit turned out to be! I never thought that harnessing some of my shabby-chic scrapbooking roots would make me so productive, but I've really enjoyed working with all of the soft, subtle colours; feminine florals and little embellishments! 


I can't wait to see how this prompt was interpreted by the rest of the team over at the Counterfeit Kit Challenge (and by this month's amazing Guest Designer, Louise Brooks) so I'll be making myself a morning cuppa and then sitting down for a little reading!

Wednesday, 16 March 2016

Insta Inspiration {Counterfeit Kit Challenge: March Challenge #3)

This month, each of the challenges at the Counterfeit Kit Challenge have been chosen by the latest additions to the Design Team. Challenge #3, chosen by the lovely Kelly, is to create an Instagram inspired mini. And what's more representative of Instagram than self-indulgent photographs of my food?


With the best intentions of creating a mini-album crammed full of shots that I took of all the lovely food stuffs we encountered in Poland, including a cream cake the size of my face*, I created a set of 'filler-pages' using my March Counterfeit Kit.

* Seriously, look at the size of that cake. It was *so* heavy!


Most of the Project Life Cards are from a set by Sodalicious, but I've also included a loyalty card from my local coffee shop. Cute, right? The business card that I found in a Polish burger bar adds a nice little spot of blue! 


Unfortunately, the 4x4 photographs that I ordered haven't arrived in time, so no finished project from me! Life has handed me a lemon - and I'm waiting for the sugar. So, instead of a finished project, at least let me show you one last image of some Polish cake? It really was amazing!

Monday, 16 November 2015

Creating Kits {Counterfeit Kit Challenge: November Challenge #3)

We are 'December Planning' over at the Counterfeit Kit Challenge for November Challenge #3 so today I'm going to share the inspiration for one of the kits I'll be using this December, along with some tips and techniques for creating a wintertime kit that doesn't include excessive amounts of themed scrapbooking supplies.

1. Start With What You Have: Although I don't have a massive selection of themed supplies I knew that I would have some in my stash so I went searching and instead of starting with cardstock - where I knew themed items would be in short supply - I went straight to my embellishments. I found some Elle's Studio die-cuts; Snowflake Charms and ... well, that was it! So, it was time to ...


2. Get Creative: The Elle's Studio die-cuts were all in shades of turquoise, pink, brown, cream and white - so this, along with the silver of my snowflake charm, became the colour scheme for my kit. I then added more embellishments with more die-cuts, charms, labels, buttons and resin flowers. I also went hunting through my cupboards and found some amazing decorations that will work as embellishments - adding in a small 'sleigh bell', icicle and super sparkly snowflake.


3. Decide On Your Project: I knew that I wanted to make a mini-album that I could use for December's Listers Gotta List Challenge. Choosing to work in a smaller size meant that, rather than raiding my stash for full size sheets of cardstock, I raided the scrap basket instead.  To start with, I chose scraps that matched my colour scheme and then whittled them down to include only those that were at least 4in x 4in.

For a unified kit, I cut down each of the scraps to 4in x 4in (keeping all of the offcuts that this created) and then rounded the corners of each sheet of cardstock.


4. Create Your Own Embellishments: I'll be using some of the off-cuts, along with my favourite stamp sets, to create some co-ordinating embellishments for my kit. Think little banners, cute cupcakes and holiday sentiments. Perfect.


5. Seek Other Sources of Inspiration: I'm hoping that I've inspired you to create your own kit but if you need extra inspiration head on over to the Counterfeit Kit Challenge where the team will be sharing their own tips and techniques for creating a kit from scratch!

Monday, 5 October 2015

Pop Tart Mini Album

Where has the time gone? Did someone steal September? One minute I was looking forward to a ridiculously busy month ahead (working in the education sector means that autumn is ridiculously busy!) and the next I was realising that it's  over! *sigh*

I had little time to myself this weekend and decided to 'chill out and craft on'. Before starting on 'Misty Morning' my Counterfeit Kit for October, I wanted to make a little something, anything, with 'Pop Tart' my Counterfeit Kit for September. And I decided on a small, but chunky, mini-album.


I started by cutting down some of my 3x4 cards to a dinky 2x3, then punched a hole at top-centre in each card. The addition of a simple journalling ring means that I'll be able to shift the pages around when I start adding photographs and memorabilia.


Using my kit, I added some embellishment clusters to a few of the pages - and I also made a small stack of additional clusters so that I can include more detail once the photographs have been added.


I've decided to use this little beauty to document a specific project, but  I'll need to do a little bit of photo-editing before I can add photographs to such a small album. I'll be sure to share the album as soon as it's completed.

In 2012, I set myself the challenge of making one pair of earrings each week during the year and it launched my fascination with beading and jewellery making. I'm intending to challenge myself again in 2016, so a little reminder of where it all started seems appropriate and the happy, bright colours seem perfect! (Want to see what I made? Earring Challenge 2012)


Believe it or not, I've 'killed my kit' as it was so small to start with - result! Now, I can look forward to working with 'Misty Morning' my Counterfeit Kit for October when I visit my local crop next week. Any plans for using up your stash this month?

Wednesday, 13 November 2013

Autumn Glow {November's Counterfeit Kit}

It might seem a little late in the month to be joining in with the Counterfeit Kit Challenge but, actually, I'm thrilled to be joining in at any point this month! It's been a long, long time since I was last able to join in with the Master Forgers because, sometimes, life just becomes stupidly busy! 

So, this month, I'm keeping it small and simple - with a mini-album kit inspired by the October Papercrafting Kit and October Artisan Kit from Jenni Bowlin. What struck me the most when I first caught sight of the Inspiration Kits was the beautiful, rich colours. Hues of mustard, brown and green, combined with hints of navy blue. It had me thinking of autumn walks in the countryside, with bright blue skies overhead and crunchy leaves underfoot - and it's this feeling that I tried to emulate with my own kit - Autumn Glow.


Knowing that I wanted to make a mini-album, I decided to start rummaging through my over-flowing basket of scrap patterned papers and cardstock. I started by pulling out papers that reminded me of the inspiration kits - whether by colour or pattern - and then cut them down to 'mini-pages' of 3 x 5 inches. I like to round the corners of my mini-albums, so I do that at this stage too - so that it's ready to go as soon as I have some photographs printed.  


You'll see that there's not really many papers in green or navy - but if you're rummaging through scraps, it's worth having an open mind about what to include. I am happy though, that I was able include lots of pattern and texture - and I adore that little piece of embossed feather paper from American Crafts!

I've added to my mini-pages with embellishments that continue the colours and textures of my kit. I found these Spring Colour Hemp Cords, which match my colour choices perfectly - and a random selection of stamped elements, die-cuts and bling. I also included alphas from October Afternoon, Sassafras and American Crafts - even finding a set of Thickers in a navy blue. Result! I'm not sure whether they'll be a little too large for the mini-album, but I'm keeping them on hand, just in case.

I'm hoping to make a start on my mini-album this weekend, when I'll be visiting my local scrapbooking crop but, in the meantime, I'm going to pop back over to the Counterfeit Kit Challenge to look for more inspiration.

Monday, 27 August 2012

Learning Something New - Mini Album

I'm eagerly anticipating the start of Shimelle's Learn Something New Every Day at the weekend.I've taken part in this annual class many times and there is something wonderfully about revisiting an old favourite. One lesson that I have learnt the hard way though, is that if I don't prepare for the class, I never finish my album!


Using August's Counterfeit Kit has made it fairly easy to get started. I cut down a lot of cardstock and patterned papers to 3 x 5 inches, 'chomped' all of the corners and punched a hole in one end of each piece. To start making the base album feel a little bit more 'lived in', I've decorated the front using a little spritz of Mister Huey's Calico Shine; added a patterned paper effect with the camera stamp from Lawn Fawn's Say Cheese Too; and added a title with some Sassafras Alphas.


Inside the album, I've started to add some additional pattern with the chevron stamp from Papersmooches Geographic - it stamps wonderfully and, because it's a clear stamp, it's so easy to build up the pattern to create a fuller effect - and some extra embellishment with some of the smaller stamps from Papersmooches Teen Routine.


It's shaping up to be a fun album, full of colour and pattern - which is one reason why I love mini-albums, they really give you a chance to experiment with new ideas, products and techniques. Looks like I've started learning already!

Is anyone else planning on taking part this year? Have you done your preparation? Please let me know so that I can come and take a look. You see the best thing about starting class, is all the new friends!

Sunday, 5 August 2012

Woo! {Storytelling Sunday}

Despite reading the many, many wonderful stories that have been told as part of Storytelling Sunday at From High In The Sky, I've never managed to actually join in by telling a story of my own, but finishing off my Notts Weekend Mini Book made me think about telling the stories from that most glorious of weekends - and I have one in particular that I'd like to share.

We were at Newstead Abbey and had begun our visit in The Great Garden - a beautiful, formal garden surrounding a rectangular pond. We were strolling around the garden when The Steve spotted one of John Nost's lead statues at the bottom of a small hill. Leaving me at the top of the hill with our bags and photography equipment, he trotted off to take a closer look.

But, when he turned to come back, he saw me lying on the ground at the bottom of the hill. He ran over to check that I was okay and found me - not injured and upset - but triumphant and deliriously happy. The hill had called to me and I hadn't been able to resist.


Unable to leave without having at least one more 'mini adventure', The Steve decided that we should, at least, have a record for future generations - presumably so that they can blame their insanity their Great Grandmother's side of the family - and here's the resulting video.
If only hill rolling was an olympic sport.....

Friday, 3 August 2012

Notts Weekend Mini Book

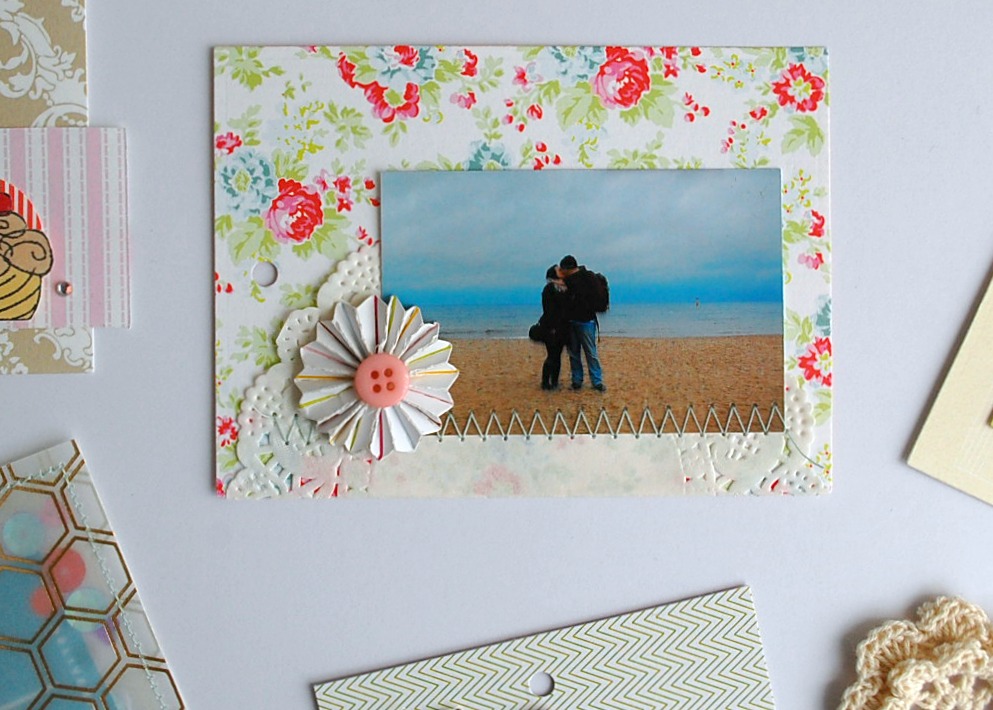
For the last couple of weeks, I've been working on turning my July Counterfeit Kit into a mini book recording our beautiful 
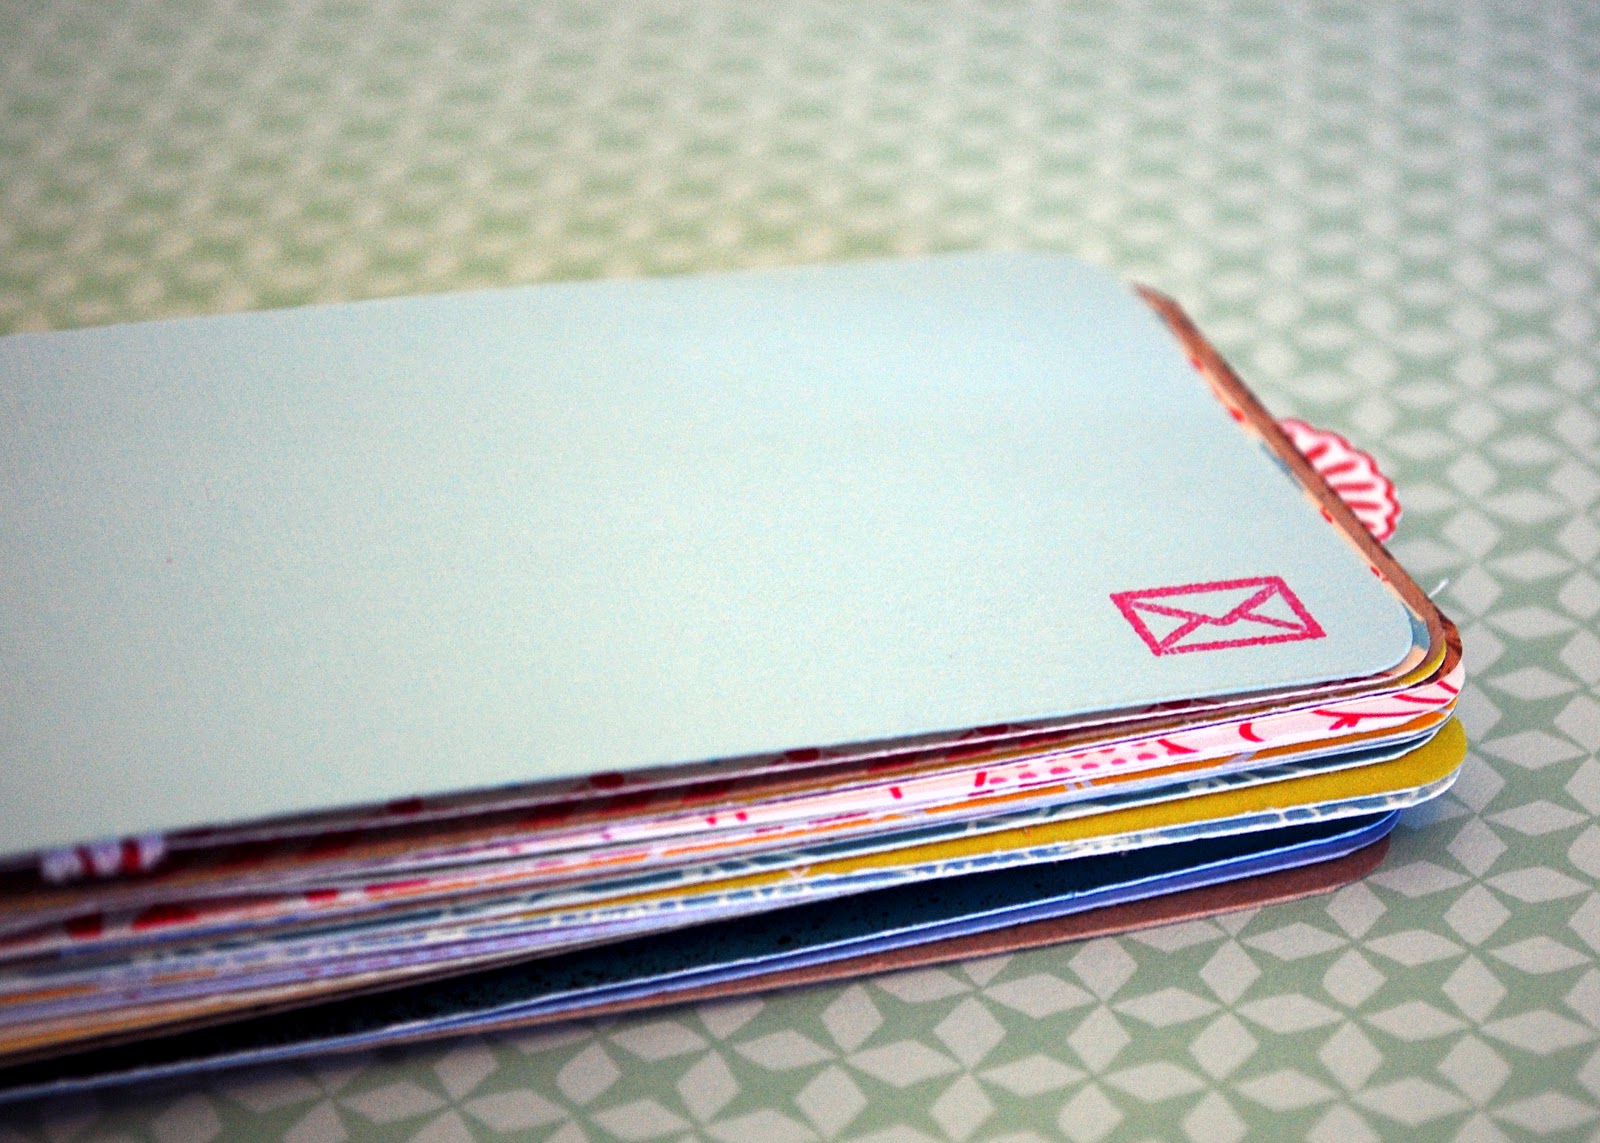
Nottingham Weekend. Lots of cutting, corner chomping, stamping and sticking later and I've finally finished. There's a lot of pages packed into one little mini book, so I've only included a few photographs. (Here's the whole Notts Weekend Mini, if you're interested.)

Notts Weekend Mini

I very much wanted the emphasis to be on the photographs and the journalling - and, I've included a lots of journalling cards to make space for those all important stories. There's still a few more stories to add in - and I'd especially like to have The Steve write a few of them. I'm conscious that I don't often include our stories from his point of view!


Because there's so many pages, I've kept my embellishments to a minimum, using my favourite Lawn Fawn sets - Bon Voyage, Bannerific and Say Cheese Too, along with some of the smaller doily shapes from the Unity set Blossom Stackers. There's some teeny bits of bling too, just to add some, but not too much, dimension and some continuity between the pages.

Notts Weekend Mini

Notts Weekend Mini

The Sassafras and Lily Bee Alphas from my Counterfeit Kit were also the perfect sizes to include mini-titles on some of my pages, highlighting important photographs and adding a little bit of texture.

Getting seriously excited by the idea of a new Counterfeit Kit which will be 'revealed' on Sunday. Between you and me, I become a little obsessed with the 'refresh' button on the 5th of each month!

Saturday, 28 July 2012

All Quiet On The (North) Western Front

I've been a little distracted recently. I've been extremely busy at work - with conferences, new projects and graduating students - and I've been working on a few personal projects, which I'll tell you all about very, very soon. 


So, I thought it was about time that I popped by to say 'hello'. Here's a little sneak of the mini-book that I'm making with July's Counterfeit Fit Kit. I'm at the 'sticking stage' and have all of my individual pages ready. Embellishment next, then the journalling. A lot of journalling. It was such a fun weekend and there are a lot of little stories to tell. 

What are you up to this weekend? Are you busy scrapbooking? Or are you out and about, living new stories?

Sunday, 15 July 2012

Country Walk {July's Counterfeit Kit}

This month's Counterfeit Kit inspiration was the beautiful 'Summer Boardwalk Kit' from Citrus Twist - a new kit club that shows a lot of promise! The inspiration kit was full of cardstock and patterned papers in blue, peach and a little bit of mustard - and was also packed with extras and embellishments. All in all, a little bit swoonsome.

The colours in the kit reminded me of the photographs from my Nottingham Weekend and, deciding that I wanted to make a mini-album, I went rummaging through my pile of scraps, instead of working my way through my pile of patterned papers and cardstock.

The result is a small, but perfectly formed, Mini Counterfeit Kit 'Country Walk'. The kit includes four full sheets of cardstock in white, blue, light grey and dark grey and samples of papers from American Crafts, Echo Park, Prima, Crate Paper and We Are Memory Keepers. 

There are two sets of Mini Market Alphas from October Afternoon and a set of Sassafras Cardstock Stickers. Embellishment wise, I've included My Minds' Eye Brads, Prima Flowers and American Crafts Delights. There are also a soft cream organza ribbon, vintage buttons, doilies, white flower beads and a handmade mustard colour yo-yo flower.


So keen to get started on preparing my mini-album, I'd already cut down and rounded all of my scraps before remembering to take a photograph of my kit papers, so there's also a small pile of off-cuts that match my album pages which will be perfect for creating additional embellishments, traditional layouts or cards. It's nice to have a few options!

Thursday, 7 April 2011

It's Counterfeit Kit Time!

I think we're all aware of just how much I love the Counterfeit Kit Challenge. I have truly had so much fun playing along with the challenge; putting together cute kits from my own stash and creating some much loved layouts as a result. And the love affair is not about end any time soon.

This month the Counterfeit Kit DT chose the amazing A Little Birdie Told Me kit - the first from Front Porch Kits - to counterfeit. Since it sold out within such a short period of time, I have no hesitation whatsoever in a little copying.


The kit is based on Echo Park's collection For The Record and, although I have the kit on order, I just could not wait to play along and put my own kit together. (Though I'm sure that once it arrives, some of the papers may find their way into my kit this month.) So, in my version of the kit, I have tons of Bazill Cardstock - I'm a big, big lover of Kraft - and some of my favourite patterned papers from American Crafts.

Patterned Papers & Cardstock From Stash

This time around I've 'splurged' on the embellishments and I've added a huge amount of flowers - some bought and some handmade - along with a variety of leaves, brads, buttons, chipboard shapes, beautiful trims and some yarn remnants. Disappointingly, I couldn't find my 'googly eyes' so expect them to appear in the kit at a later stage if I manage to hunt them down!

Trims And Pretties

I'm also using my new stamp set from Make The Day Special - Naturally You. How perfect are these stamp sets? I couldn't believe it when I saw the kit and knew I had just the right stamps!

In the process of putting my kit together, I also pulled rather a large amount of scraps - some paper, some fabric - and although there's no add on kits with the original I've made my own - Birdhouse In Your Soul.

Birdhouse In Your Soul Mini Kit

This little kit is perfect for making mini-books, cards and smaller, little projects and is made up a ton of paper scraps in colours and patterns to match the main kit. Also included are several fabric remnants, burlap and some tidbits of ribbon, along with more delicious trim and another stamp from Itty Bitty - Dreams Make 'Em Happen. What do you think? Can I manage to make teeny, tiny scraps look appealing?

I can't wait to start creating with my counterfeit kits, but before I love you and leave you, I just wanted to say a massive thank you for all the comments on my kits and layouts last month. I'm overwhelmed with gratitude, especially for those of you who wanted to scraplift my layouts - what a compliment! Please go right ahead! And then show me? Anyway, I just wanted you all to know that during what was a tough month at work, you all seriously kept me going. Much love x